Did you know that banana peels, often tossed away as waste, can be transformed into a powerful natural fertilizer? Rich in essential nutrients like potassium, phosphorus, and calcium, banana peels can enhance plant growth, improve soil health, and promote flowering and fruiting.
Follow this simple step-by-step guide to make your own homemade banana peel fertilizer and give your garden a natural boost!
🌱 Why Use Banana Peel Fertilizer?
✅ Rich in Nutrients: Provides essential minerals like potassium (for flowering), phosphorus (for root growth), and calcium (for cell strength).
✅ Cost-Effective: No need for expensive store-bought fertilizers—this is completely free!
✅ Eco-Friendly: Reduces food waste and benefits your plants naturally without harmful chemicals.
✅ Easy to Make: Requires only three ingredients and minimal effort!
🍌 Materials Needed
✔ Banana Peels – Collect a few ripe banana peels (the more, the better!).
✔ Jar or Container – Use a jar with a lid to hold the mixture.
✔ Water – Needed to soak and ferment the peels.
✔ Time & Patience – Allow fermentation for a week for best results.
📝 How to Make Homemade Banana Peel Fertilizer
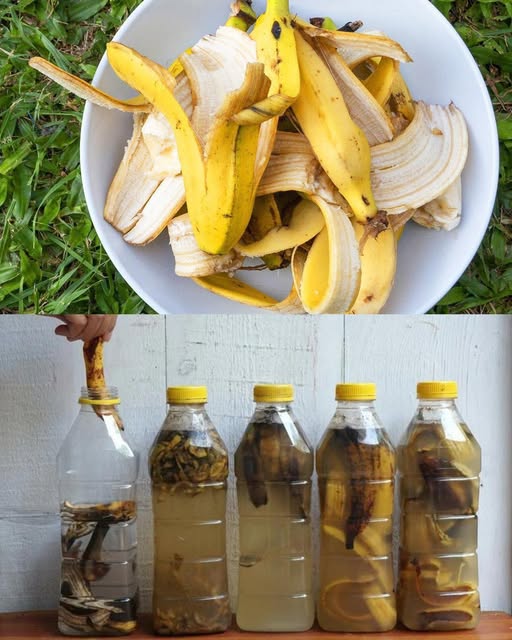
Step 1: Collect Banana Peels
Save ripe banana peels from your kitchen. You can collect them over a few days until you have a sufficient quantity.
Step 2: Cut the Peels
✂ Chop the banana peels into smaller pieces. This speeds up decomposition and releases nutrients faster.
Step 3: Place in a Jar
🥤 Fill a clean jar or container halfway with the chopped banana peels. Leave space for water.
Step 4: Add Water
💧 Pour water into the jar, making sure the banana peels are fully submerged. Then, seal the jar with a lid.
Step 5: Fermentation
🕒 Store the jar in a cool, dark place for about one week.
✨ During this time, the banana peels break down and release nutrients into the water.
Step 6: Strain the Liquid
🔹 After a week, strain the liquid into another container. This nutrient-rich liquid is your homemade banana peel fertilizer!
Step 7: Dilute the Fertilizer
⚖ Mix one part banana peel fertilizer with five parts water.
💡 You can adjust the concentration depending on your plants’ needs.
Step 8: Apply to Plants
🌱 Use the diluted fertilizer to water your plants at the base. Avoid applying directly to leaves to prevent staining.
🌿 Benefits of Banana Peel Fertilizer
🌸 Encourages Flowering & Fruiting – High potassium content helps plants bloom and produce more fruit.
🌾 Strengthens Roots – Phosphorus in banana peels supports strong root development.
🛡 Protects Against Diseases – Calcium helps strengthen plant cells, making them more resistant to diseases.
💰 Budget-Friendly & Sustainable – No chemicals, no cost, just nature at its best!
🌍 Other Ways to Use Banana Peels in Gardening
🔹 Bury Banana Peels in Soil
🥄 Chop banana peels into small pieces and bury them around your plants for slow-release nutrients.
🔹 Make a Banana Peel Spray
🌿 Blend banana peels with water and strain into a spray bottle. Use as a natural leaf fertilizer for added nutrition.
🔹 Add to Compost
♻ Banana peels are compost-friendly! Toss them into your compost bin to enrich soil naturally.
⚠️ Tips & Precautions
✔ Avoid fermenting for too long – Over-fermenting can lead to bad odors.
✔ Do not overuse – Too much potassium may disrupt plant balance. Apply once every 1-2 weeks.
✔ Best for fruiting and flowering plants – Works great for tomatoes, peppers, roses, and cucumbers!
🌱 Final Thoughts: Nature’s Free Gift for Your Garden!
Instead of tossing banana peels into the trash, turn them into an all-natural, cost-free fertilizer for a healthier, thriving garden. This easy DIY method ensures your plants receive essential nutrients while keeping your gardening eco-friendly and sustainable.
💡 Try this today and watch your garden flourish!
🌍 Inspired by this? Share this article with your fellow gardeners! 🌿✨